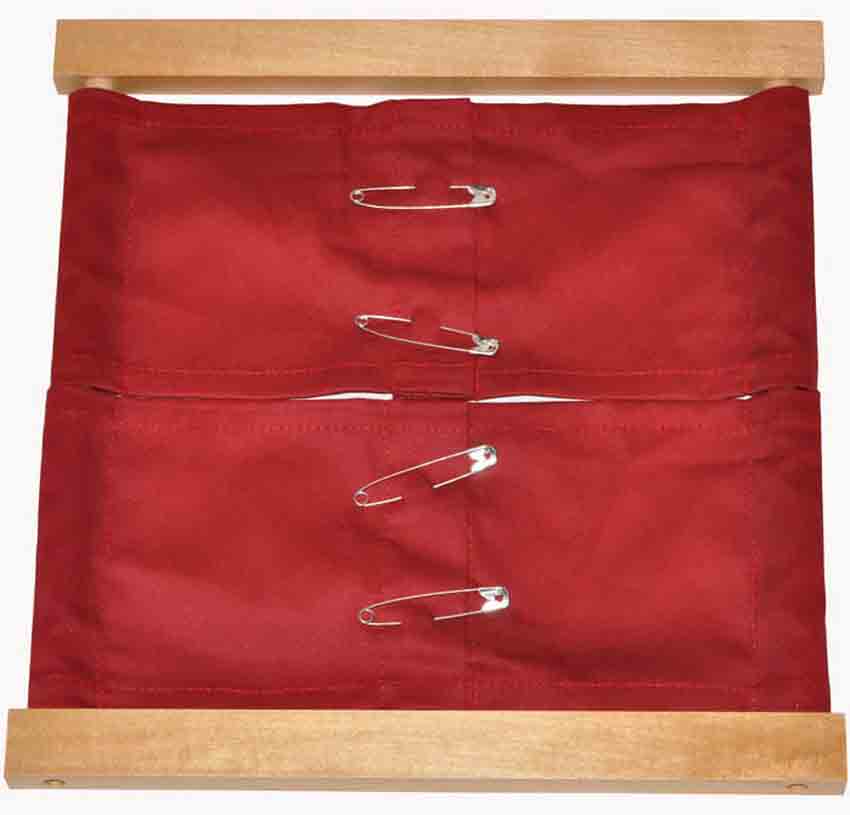
Safety Pin Frame
Invite a child to come by telling them you have something to show them. Have the child bring the appropriate dressing frame and have them place it on a specific spot on the table you will be working at. Have the child sit down first, and then you sit down to the child’s right. Tell the child that you will be showing him how unpin and pin safety pins. Give the names of each part.
Unpinning
(Place the frame so the catch of the pin is to the left.)
- Place your right index finger on the tip of the spring of the top pin and push the pin to the far left and remove your finger.
- Repeat for the other three pins working your way from the top to the bottom.
- Pinch the spring side of the top pin with your right thumb and index finger.
- Pinch the catch with your left thumb and index finger.
- Unpinch your right fingers and place your thumb on the bottom bar of the pin and your index on the top bar of the pin.
- Push the bottom pin up to the catch with your thumb.
- Rotate your thumb slightly towards yourself and then down to unhook the pin tip from the catch.
- Remove your right fingers.
- Unpinch your left fingers.
- Pinch the spring with your right thumb and index finger and pull slowly to the right until the pin is out of the material.
- Rotate the pin so that it is vertical with the catch on the top.
- Rotate slightly to the side so the child can easily see when the tip will go in the catch.
- Place your left thumb on the bar closest to you and your left index finger on the other bar (the bar with the tip).
- Press your left index finger towards your left thumb and bring the tip close to the catch.
- Move the tip using the pressure of your index finger to place it into the catch.
- Remove your left fingers.
- Offer the pin to the child so he can practice how to open and close a safety pin.
- Have the child place the pin above the frame.
- Repeat these movements of taking out the pins working your way from the top to the bottom.(If the child needs more practice in opening and closing the pins, allow the child the practice. If not, you place the pins above the frame.)
- Open the bottom right flap and then the top right flap.
- Then open the bottom left flap and then the top left flap.
- Close the top left flap and then the bottom left flap.
- Close the top right flap and then the bottom right flap.
Pinning
- Pinch the spring of a pin with your right thumb and index finger.
- Lift the pin vertical so the catch is on the top.
- Rotate the pin slightly so the child will be able to see with the tip comes out of the catch.
- Place your left thumb on the bar closest to you and your left index finger on the other bar. (This should be the bar with the tip.)
- Gently press your left index finger toward your left thumb and slightly rotate it so the tip comes out of the catch.
- Slowly open your fingers.
- Remove your left finger.
- Pinch the bottom part of the material with your left thumb and index finger.
- Lift the material slightly.
- Place the tip of the pin into the material to the far right side of where the two flaps meet.
- Push the tip in through the material a little bit more.
- Rotate the material up a little so you and the child can see the tip out the other side.
- Keeping the material up, rotate the tip up so it goes back through the material a few centimeters to the side of where it first came through.
- Rotate the material back down to see the tip come out of the front side of the material.
- Let go of the material with your left fingers.
- Pinch the catch with your left thumb and index finger.
- Remove your right fingers and place your right thumb on the bottom bar and your right index finger on the top bar.
- Press your thumb up so the tip meets the catch.
- Rotate the tip in toward the catch and then slightly release the pressure of your thumb so the tip hooks into the catch.
- Remove your right fingers and then your left.
- Repeat all these movements working your way from the bottom to the top.(When you are placing the pin at the top of the material, pinch the material with your left fingers at the top of where the flaps meet.)
Once done, offer the child the opportunity to unpin and pin.
Direct: To help them learn how to use safety pins safely.
Indirect: Acquiring coordination of movement.
The moment with the tip gets unhooked from the catch.
4-5 years